> ## Documentation Index
> Fetch the complete documentation index at: https://docs.wapikit.com/llms.txt
> Use this file to discover all available pages before exploring further.
# 📣 Campaign Creation
> Create and launch a WhatsApp campaign using Wapikit
This guide walks you through how to create and launch a WhatsApp campaign using Wapikit. Follow these simple steps to set up your campaign, configure personalization, and send messages to your audience.
***
## 🚀 Steps to Create a Campaign
Go to the /campaigns page from the main sidebar and click the Create Campaign button.
 Choose the template you want to use.\
If your template includes variables (like
Choose the template you want to use.\
If your template includes variables (like `{{1}}` for name), you'll configure them in the next steps.
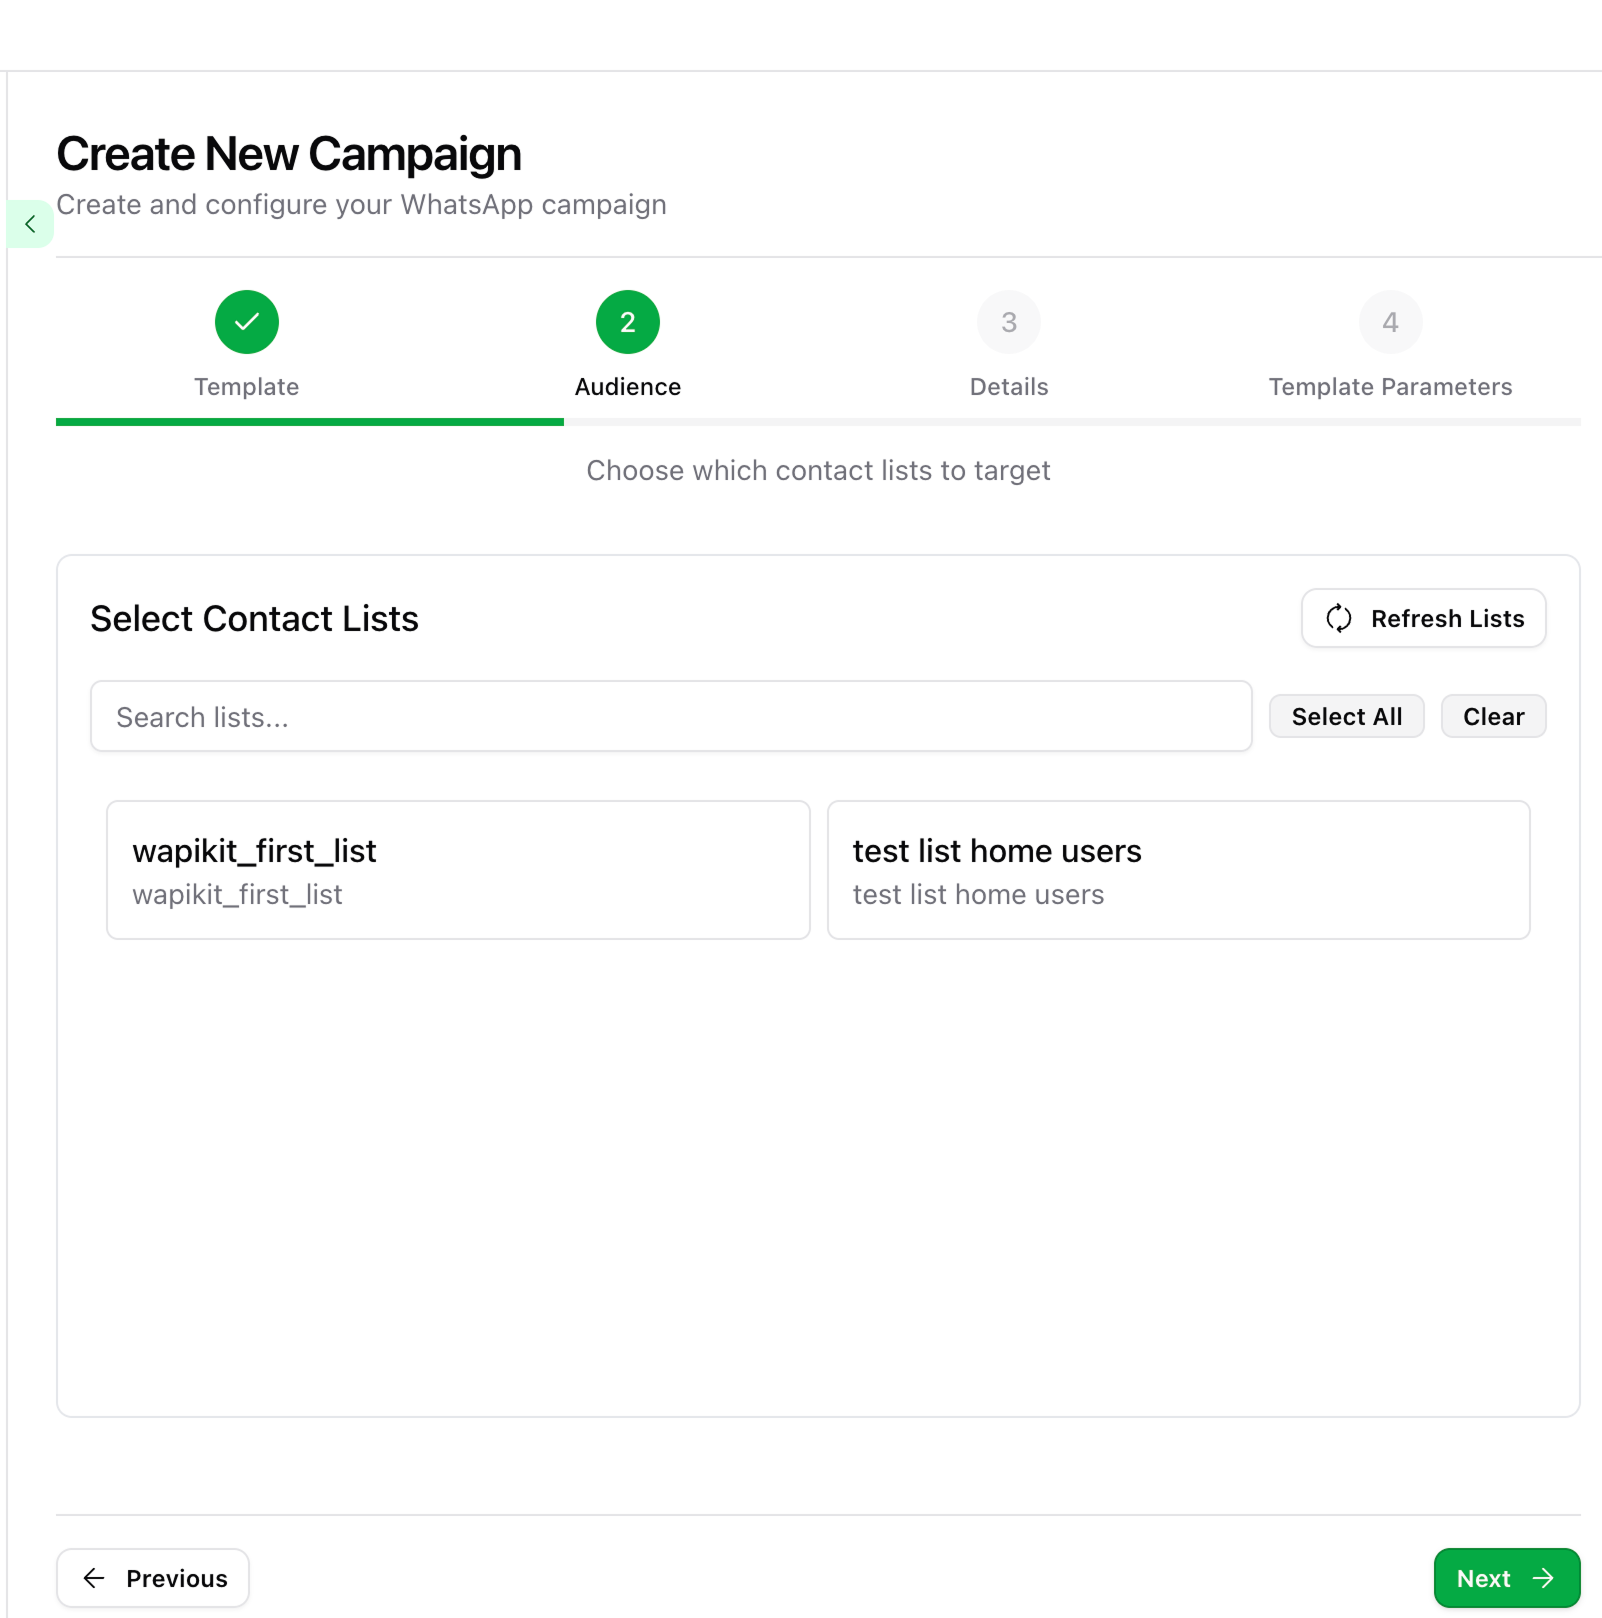
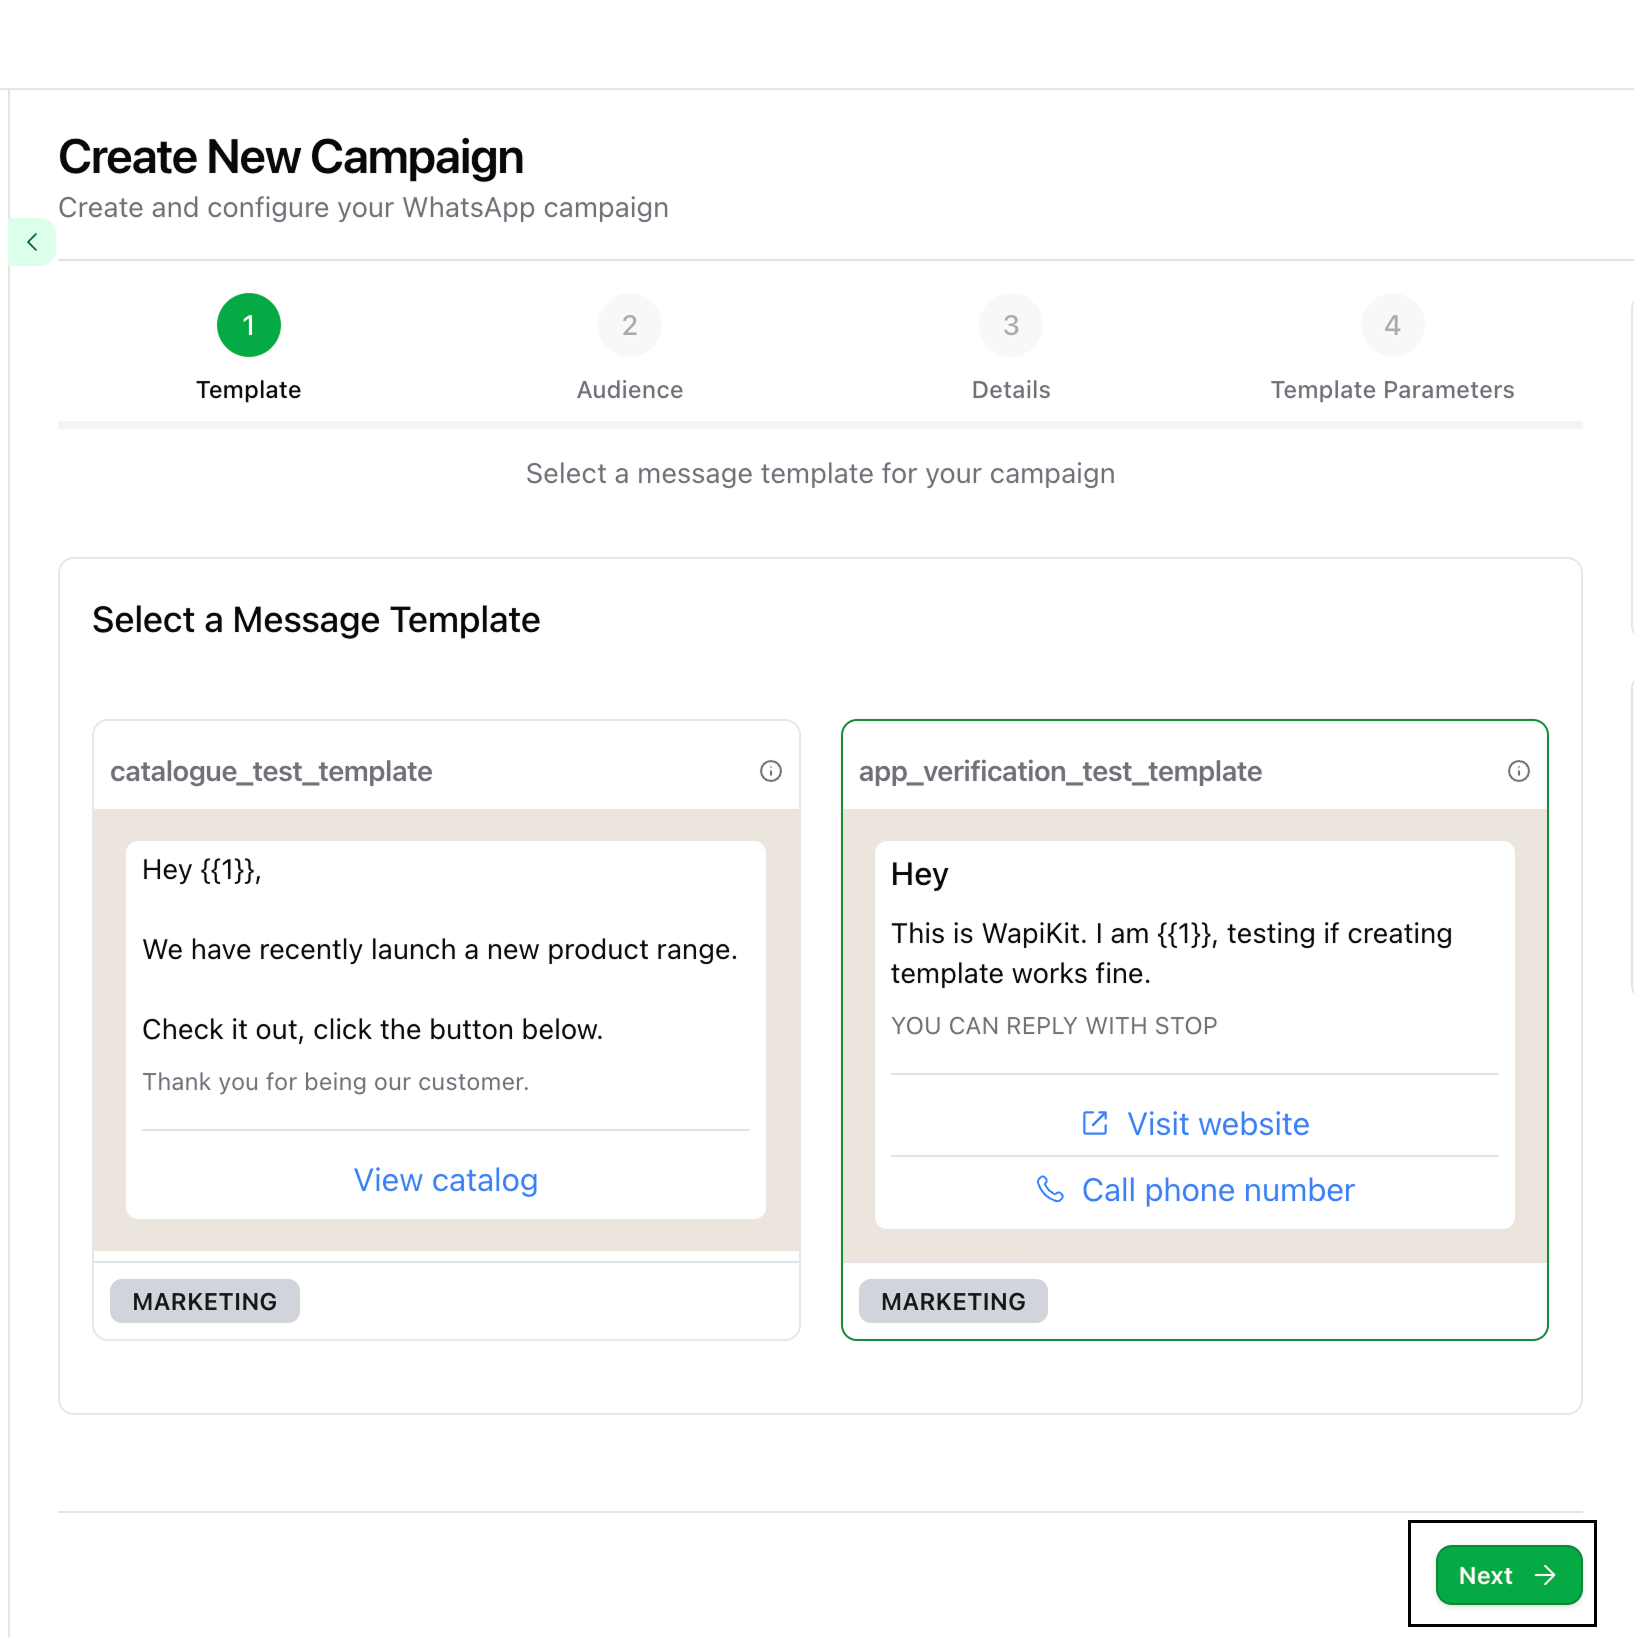 Select the contact list(s) to which you want to send this campaign, then click Next.
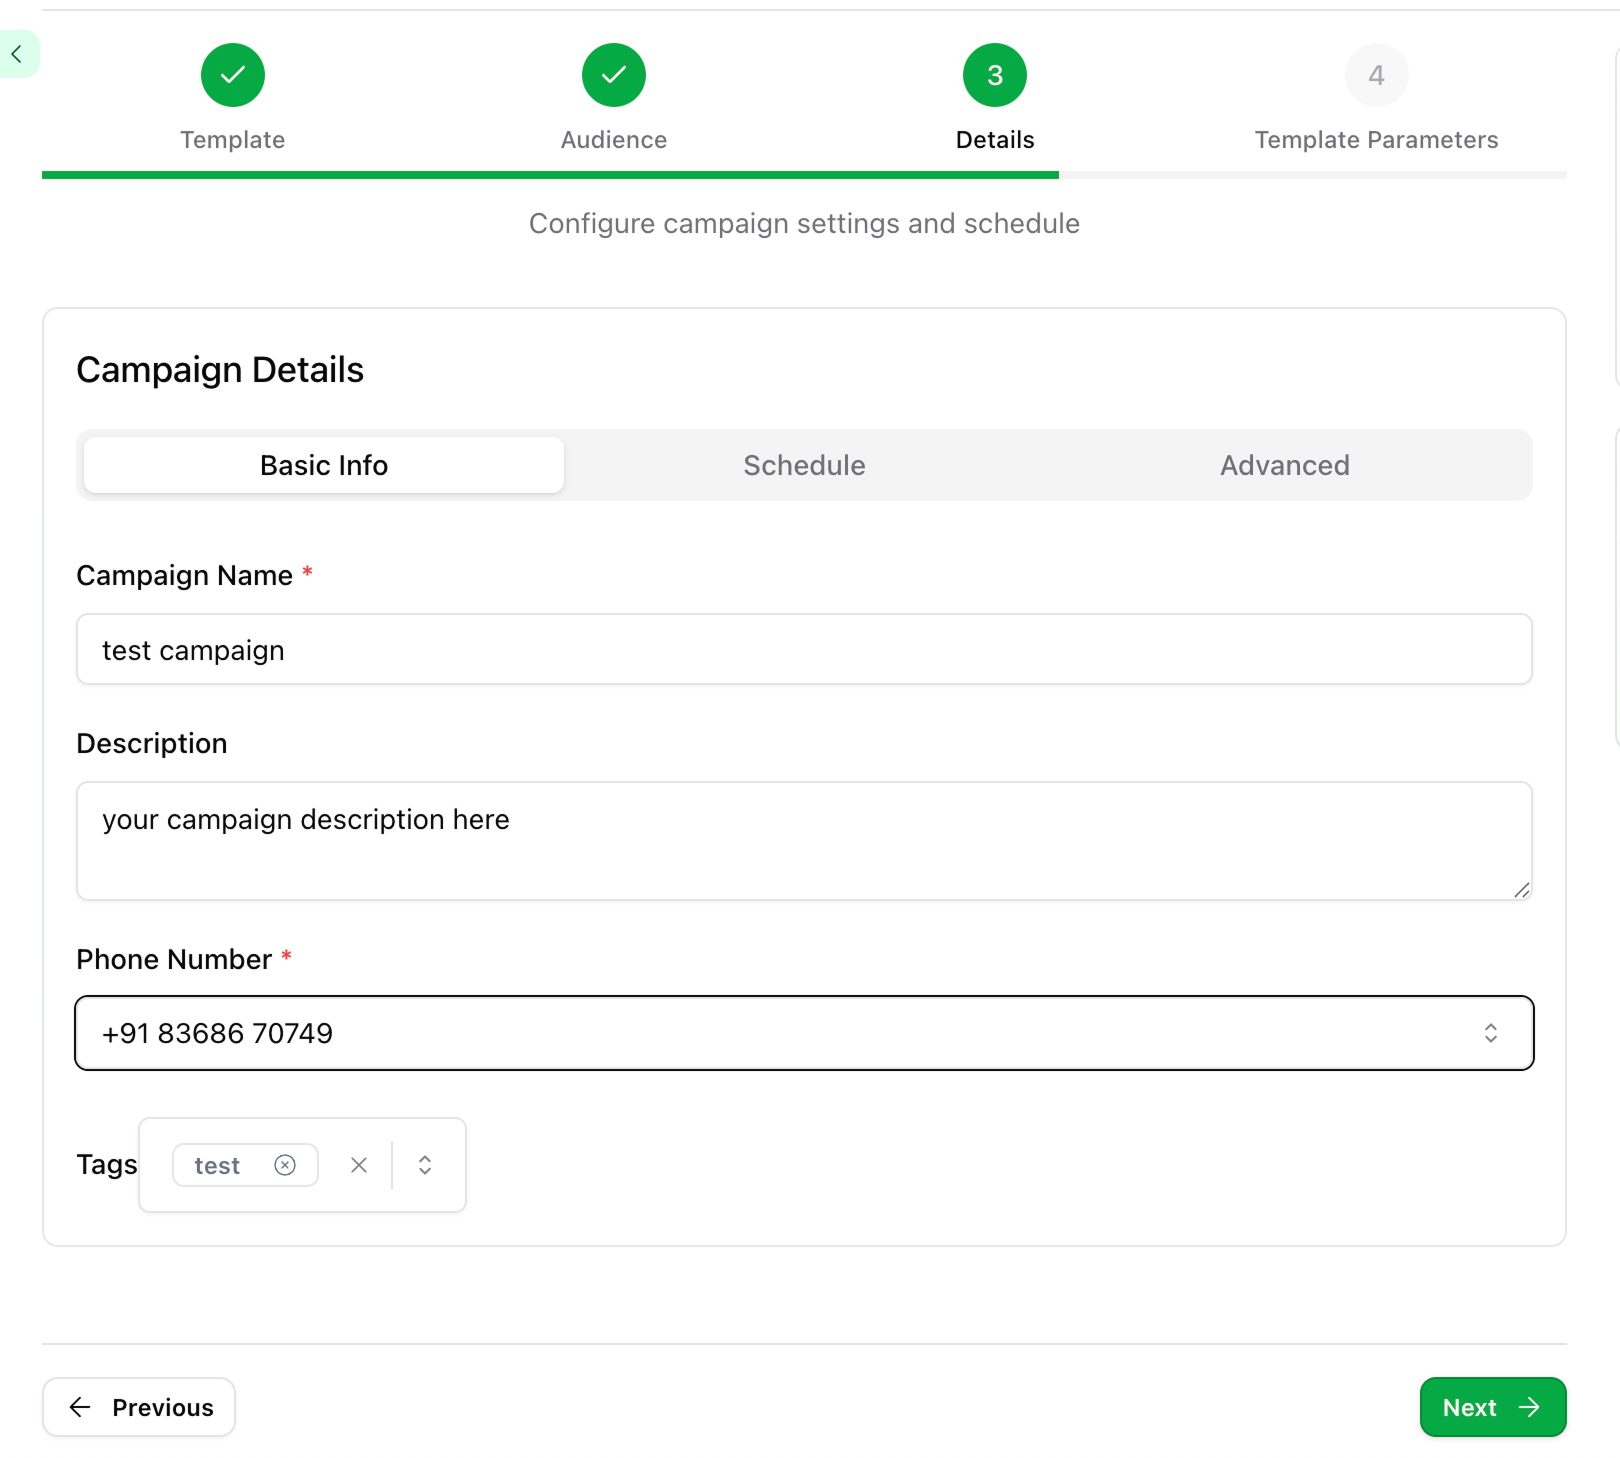
 * Campaign Name: A unique identifier for your campaign
* Description: Optional short description
* Phone Number: Your registered WhatsApp number
* Tags: Help organize, group, and filter campaigns later
Tags help with filtering analytics, bulk actions, and grouping campaigns.
* Campaign Name: A unique identifier for your campaign
* Description: Optional short description
* Phone Number: Your registered WhatsApp number
* Tags: Help organize, group, and filter campaigns later
Tags help with filtering analytics, bulk actions, and grouping campaigns.
 ***
## ✍️ Template Parameter Configuration
This step will appear only if your selected template includes parameters like personalization fields or quick replies.
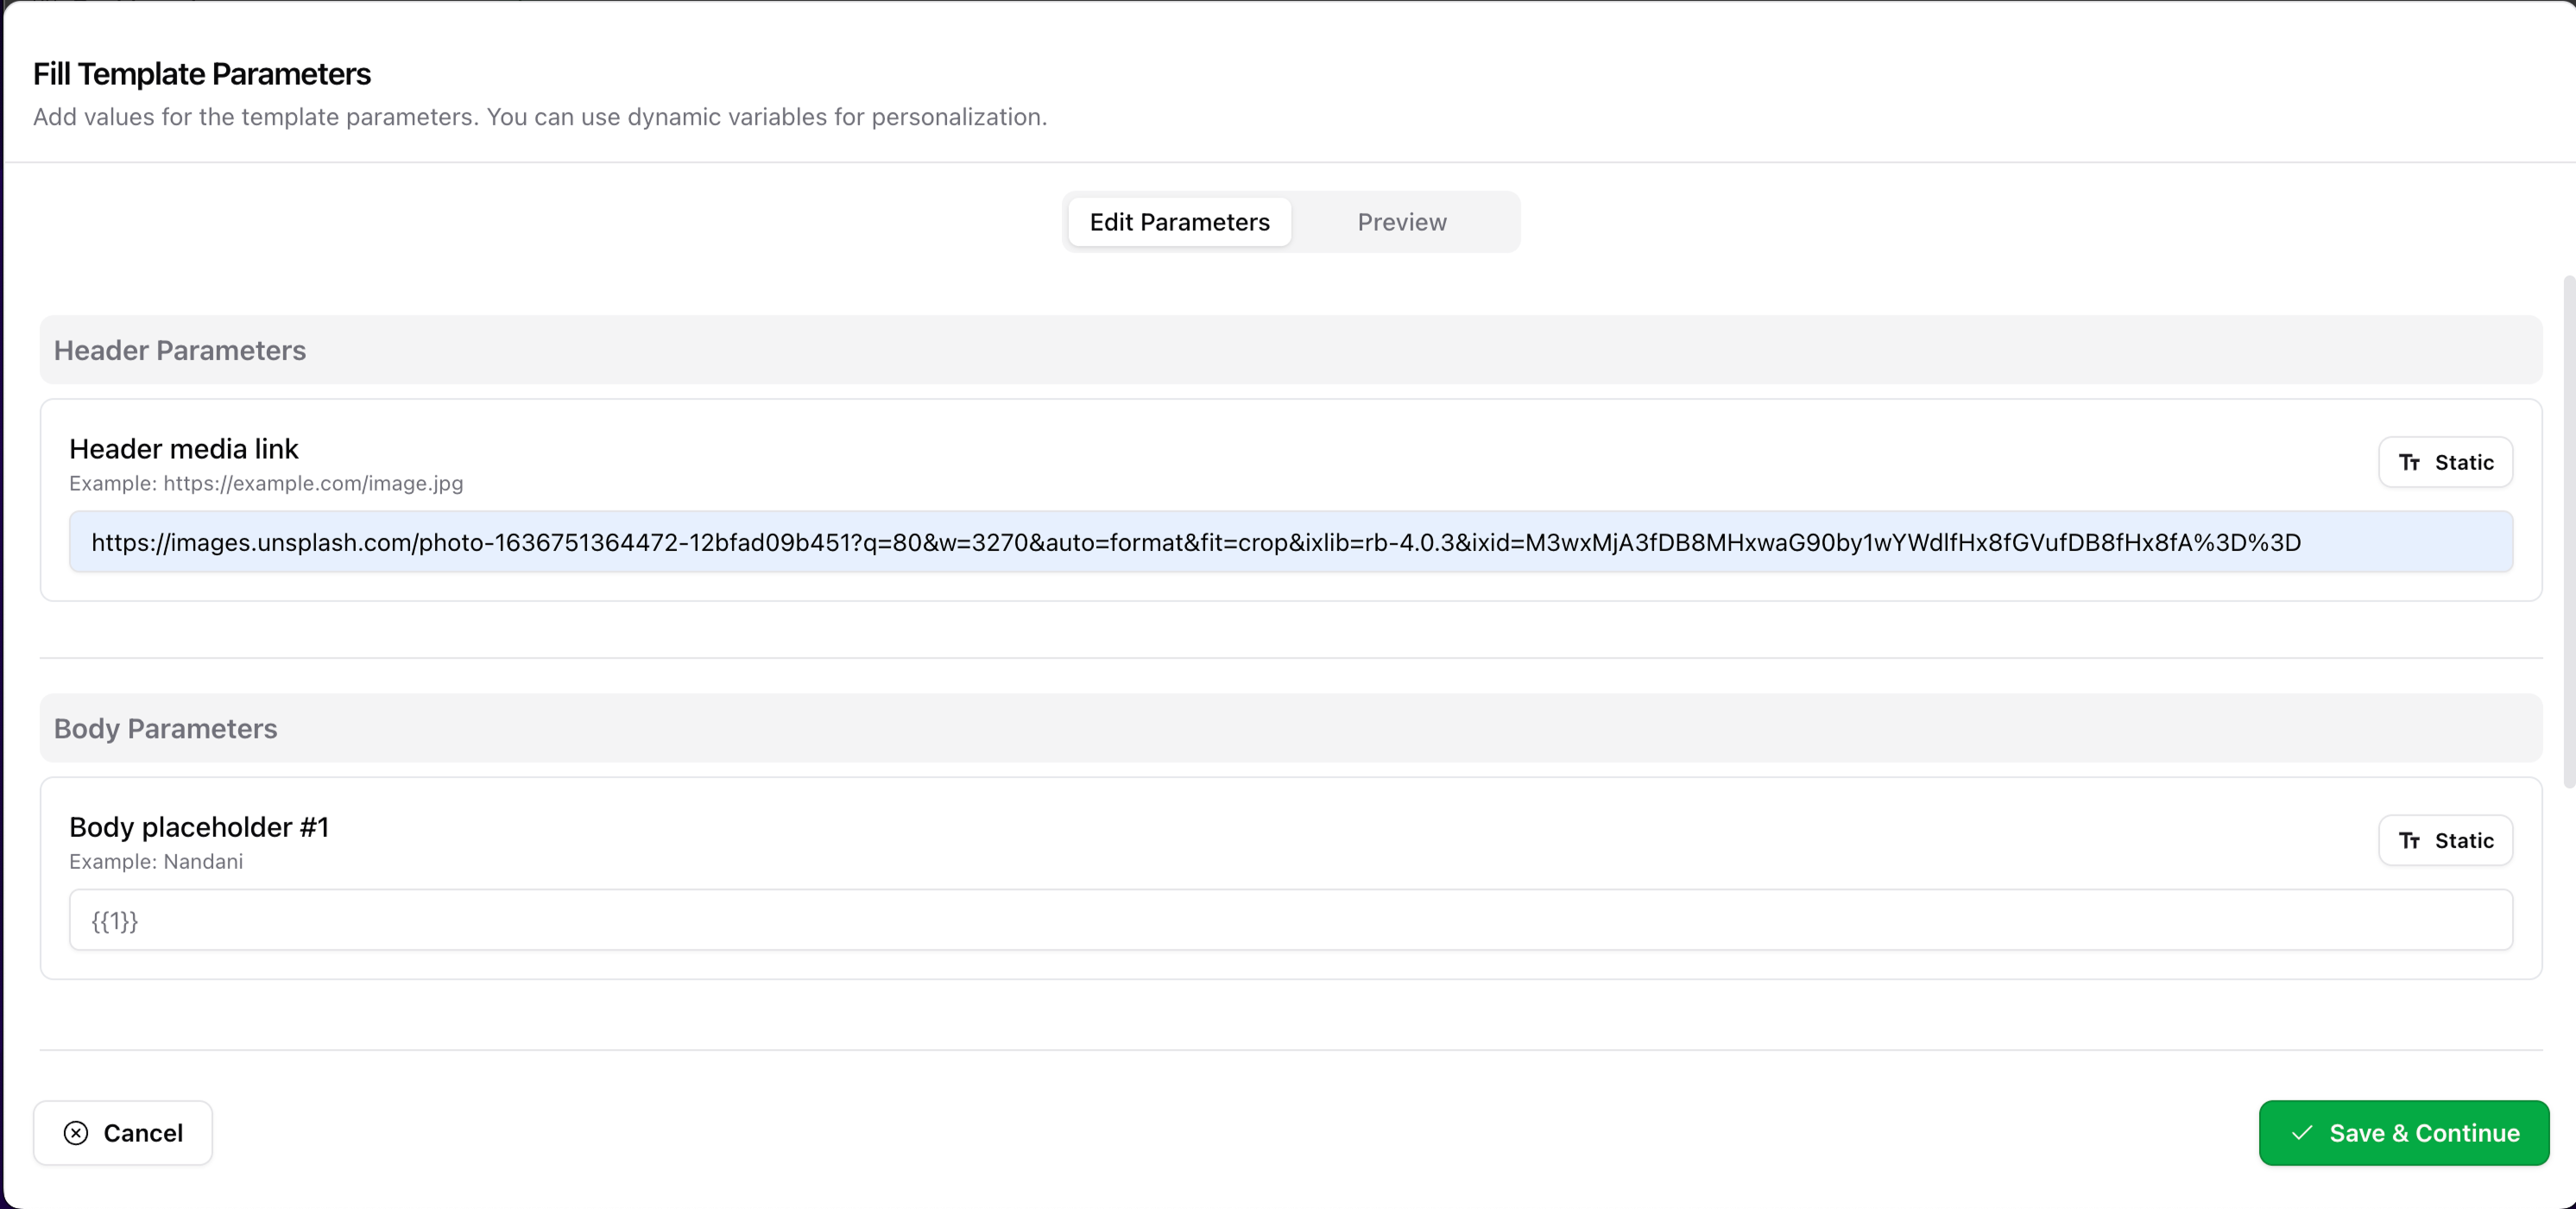
Click the Configure Template Parameters button.
***
## ✍️ Template Parameter Configuration
This step will appear only if your selected template includes parameters like personalization fields or quick replies.
Click the Configure Template Parameters button.
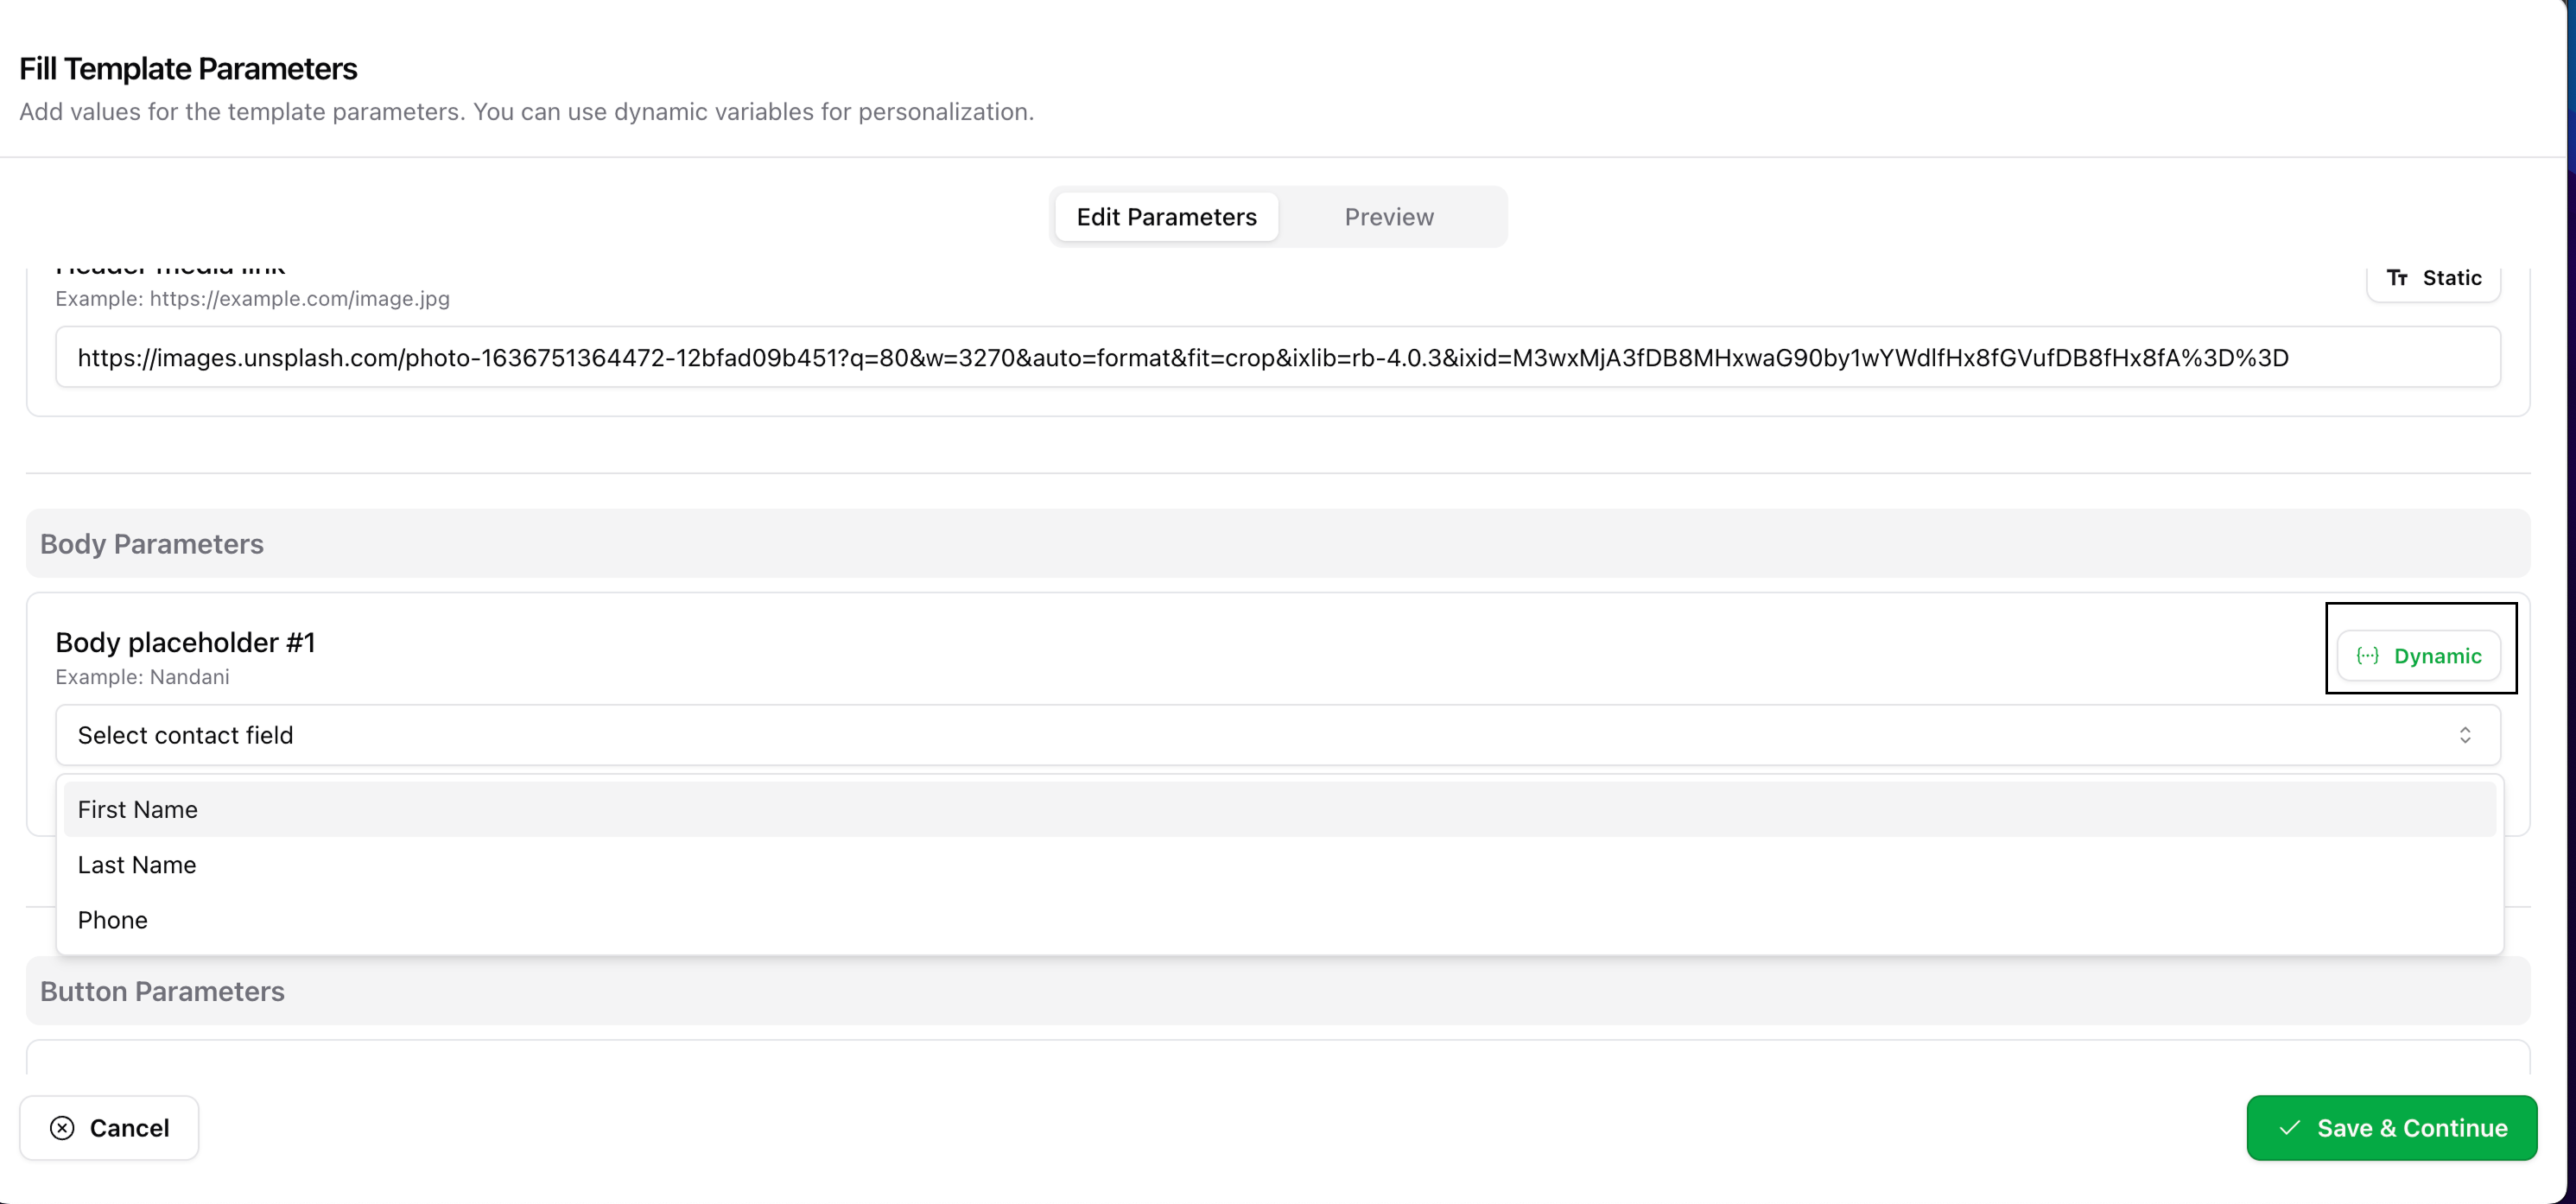
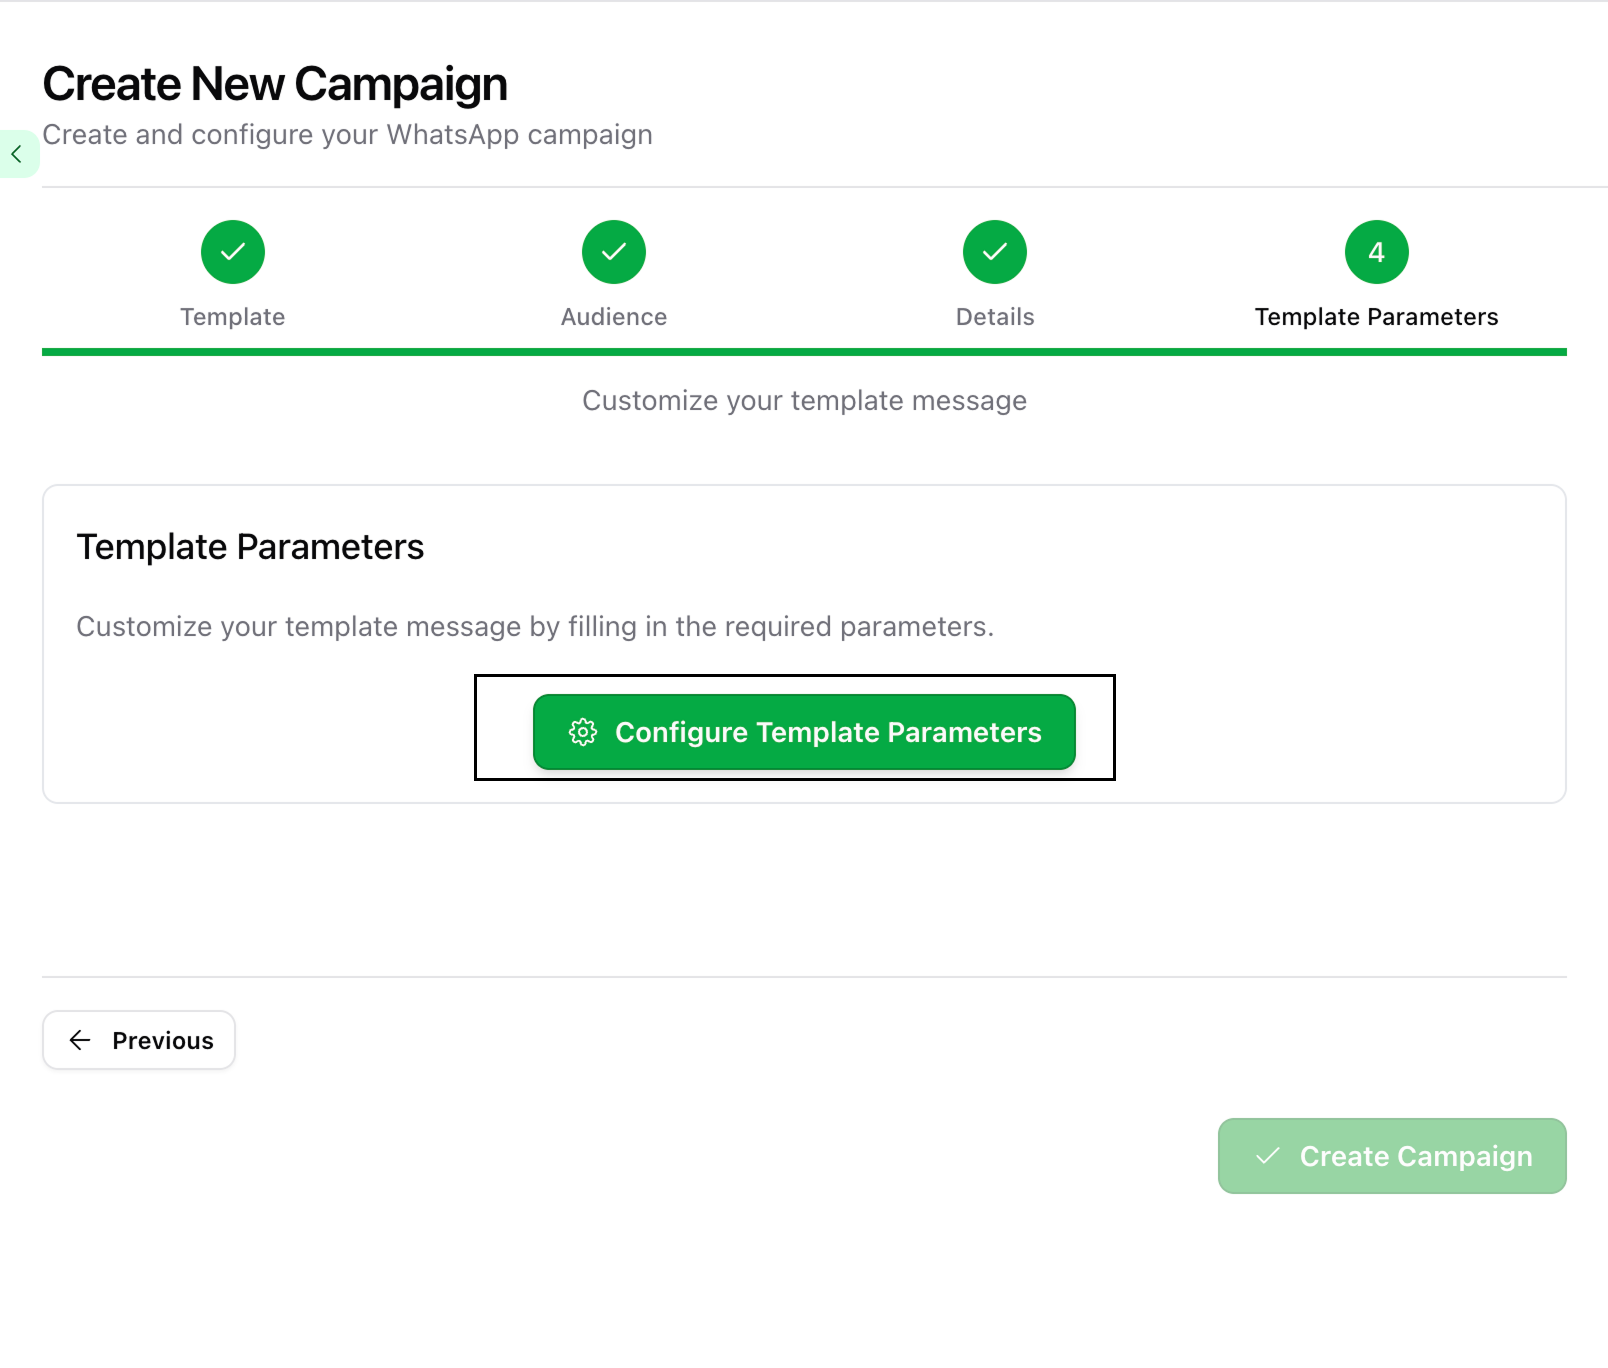 You can:
* Add static text values manually
* Switch to Dynamic mode using the toggle on the right and select fields like First Name, Last Name, or Phone
You can:
* Add static text values manually
* Switch to Dynamic mode using the toggle on the right and select fields like First Name, Last Name, or Phone
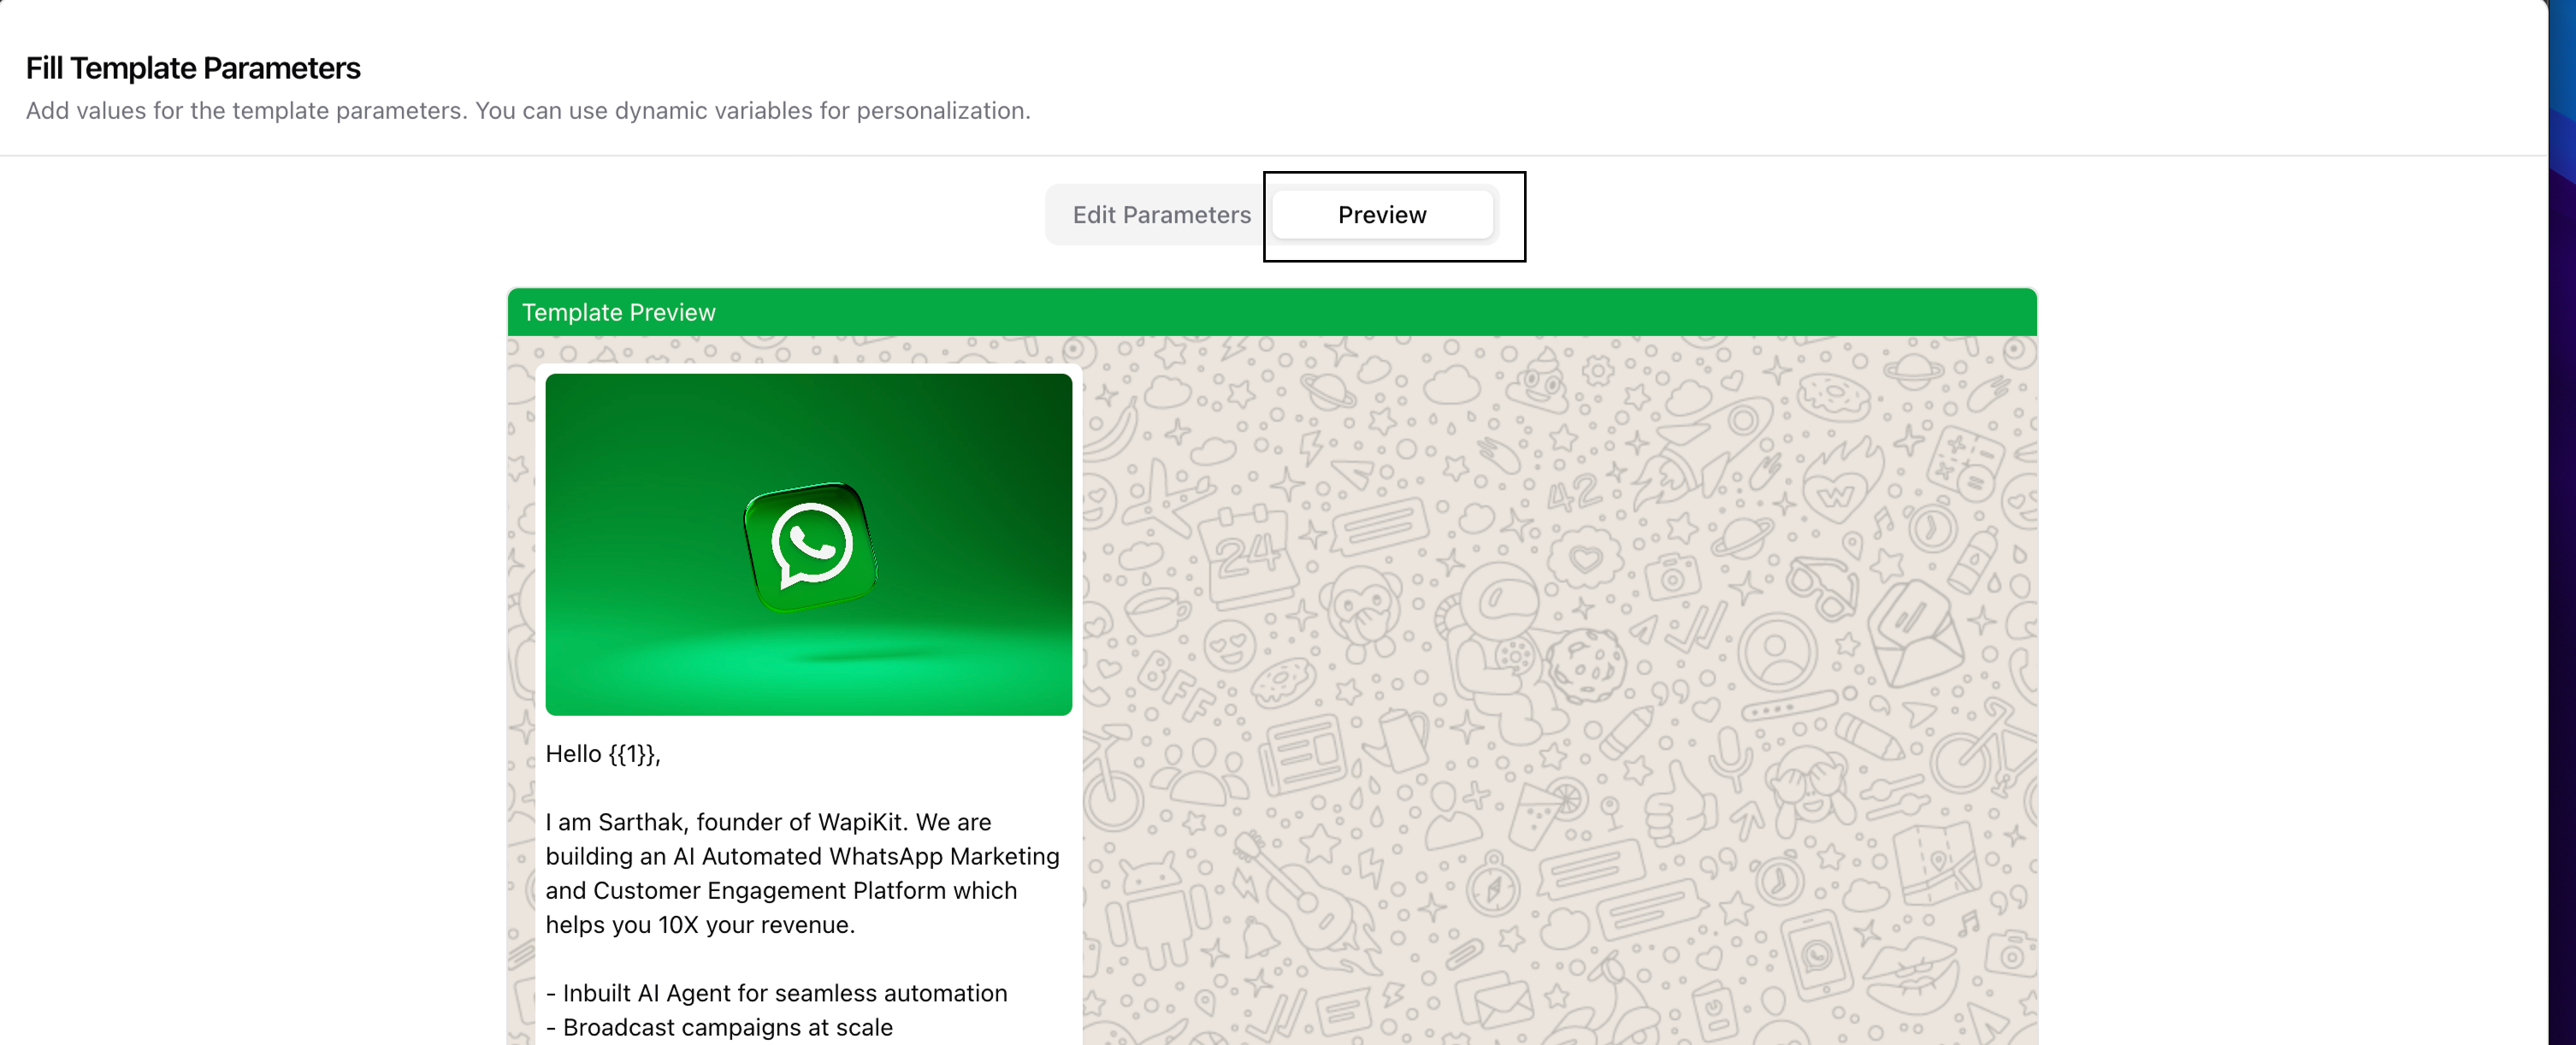
 Use the Preview button to validate how the message looks with actual contact data.
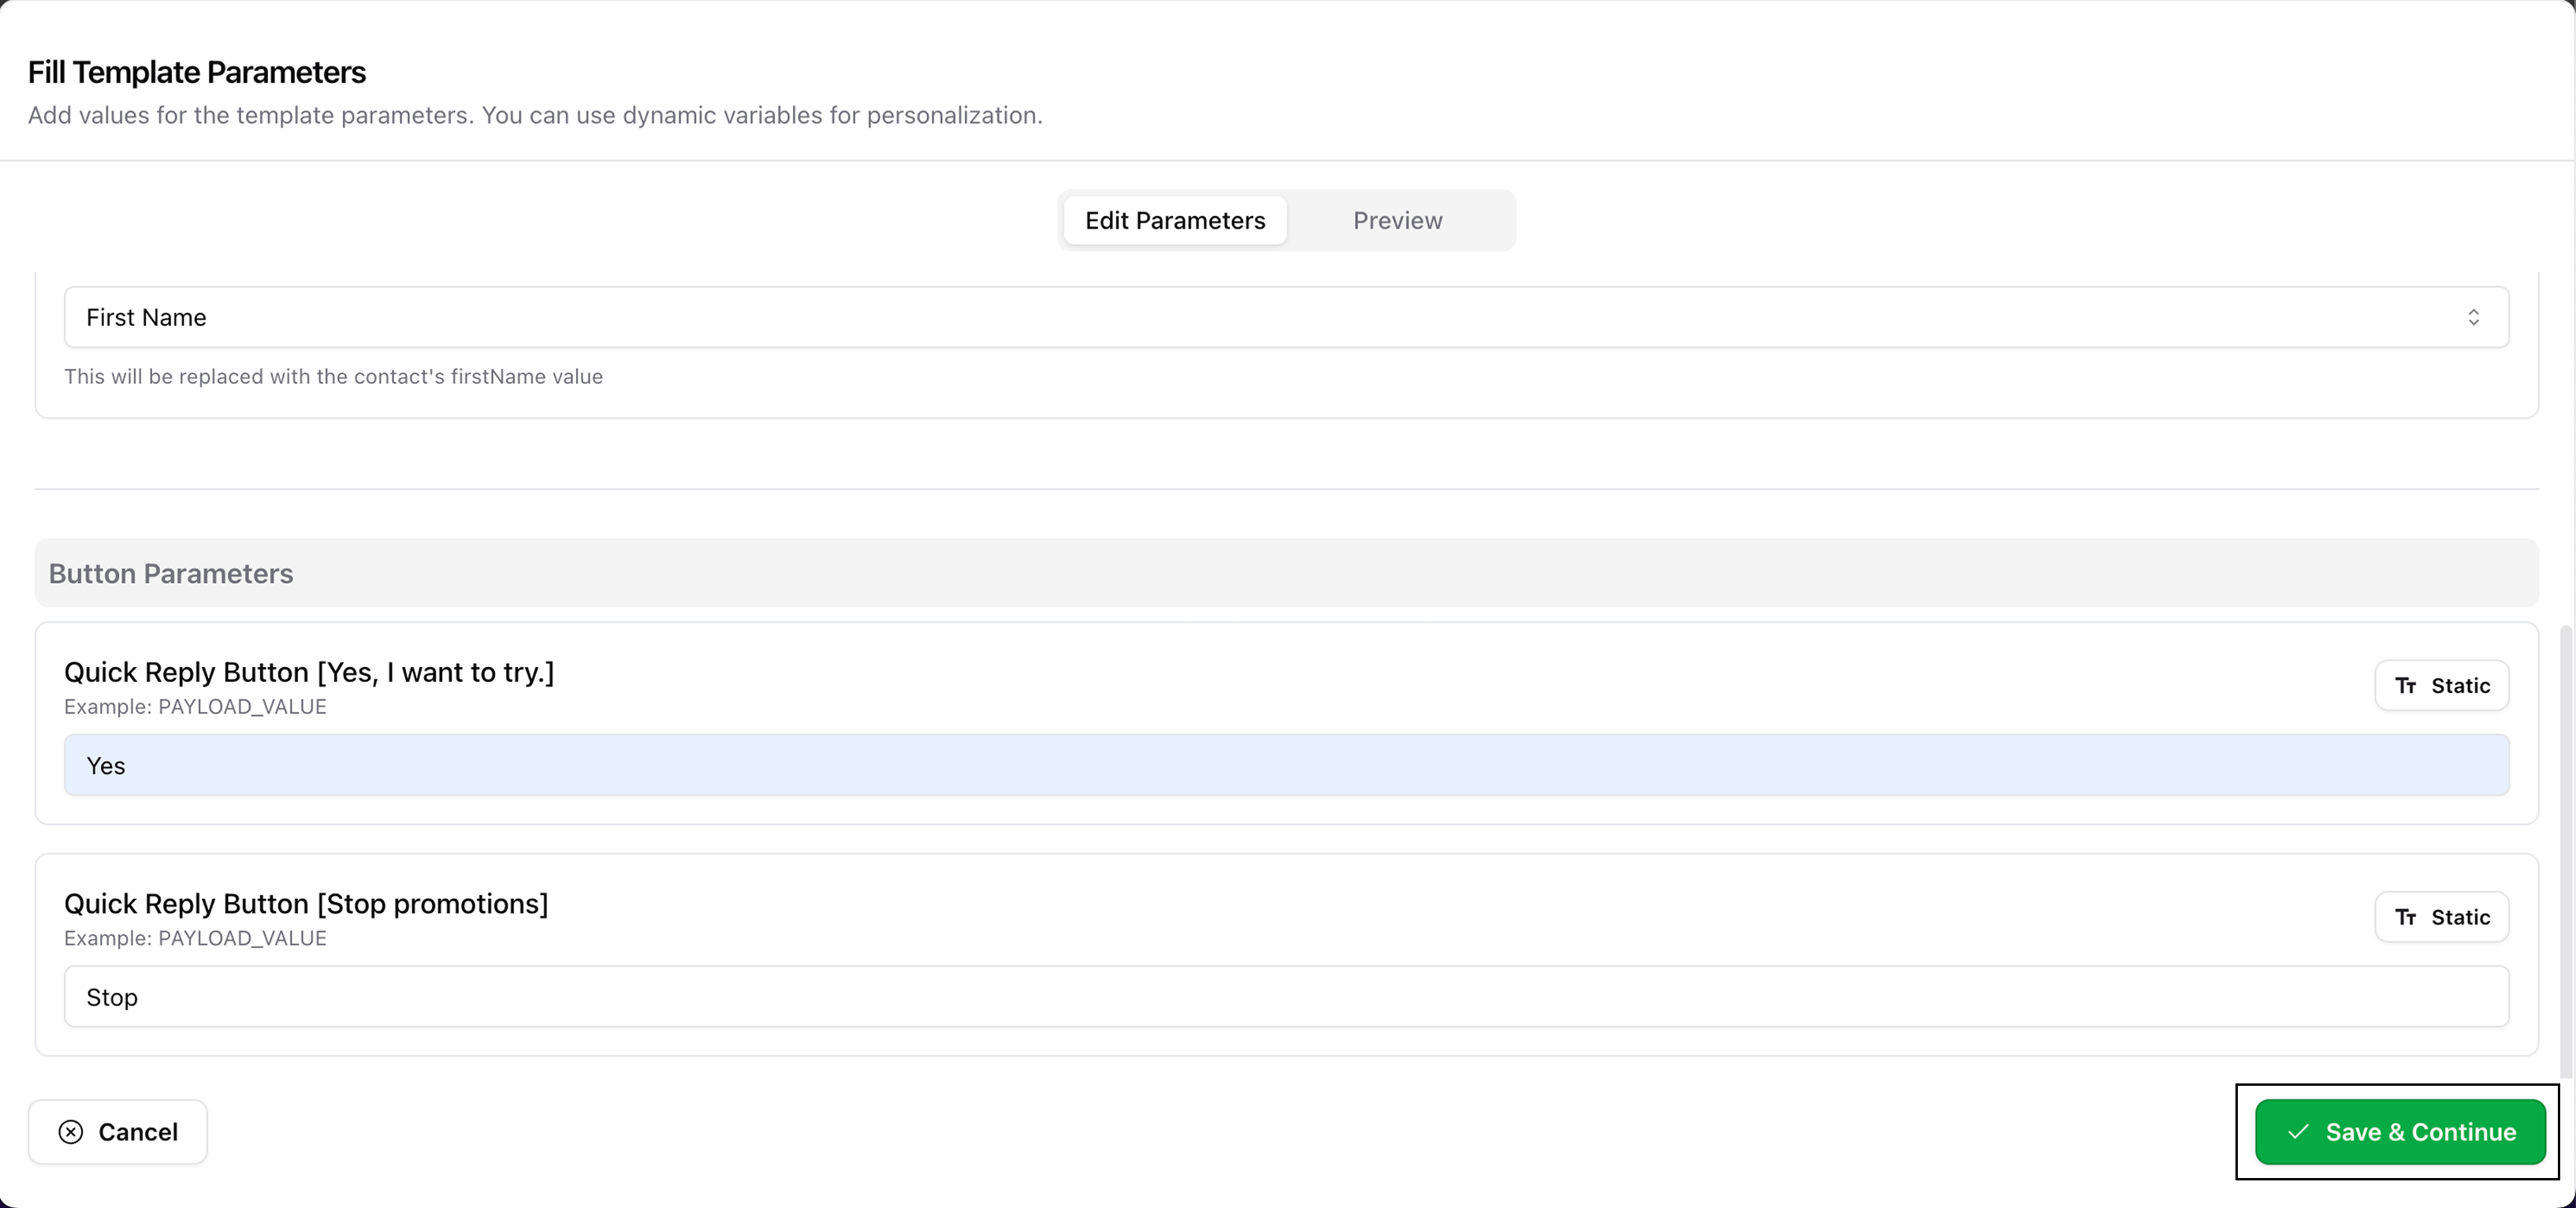
 Ensure all parameter fields are filled correctly and click Save & Continue.
 ***
## 🎯 Finalize & Send Campaign
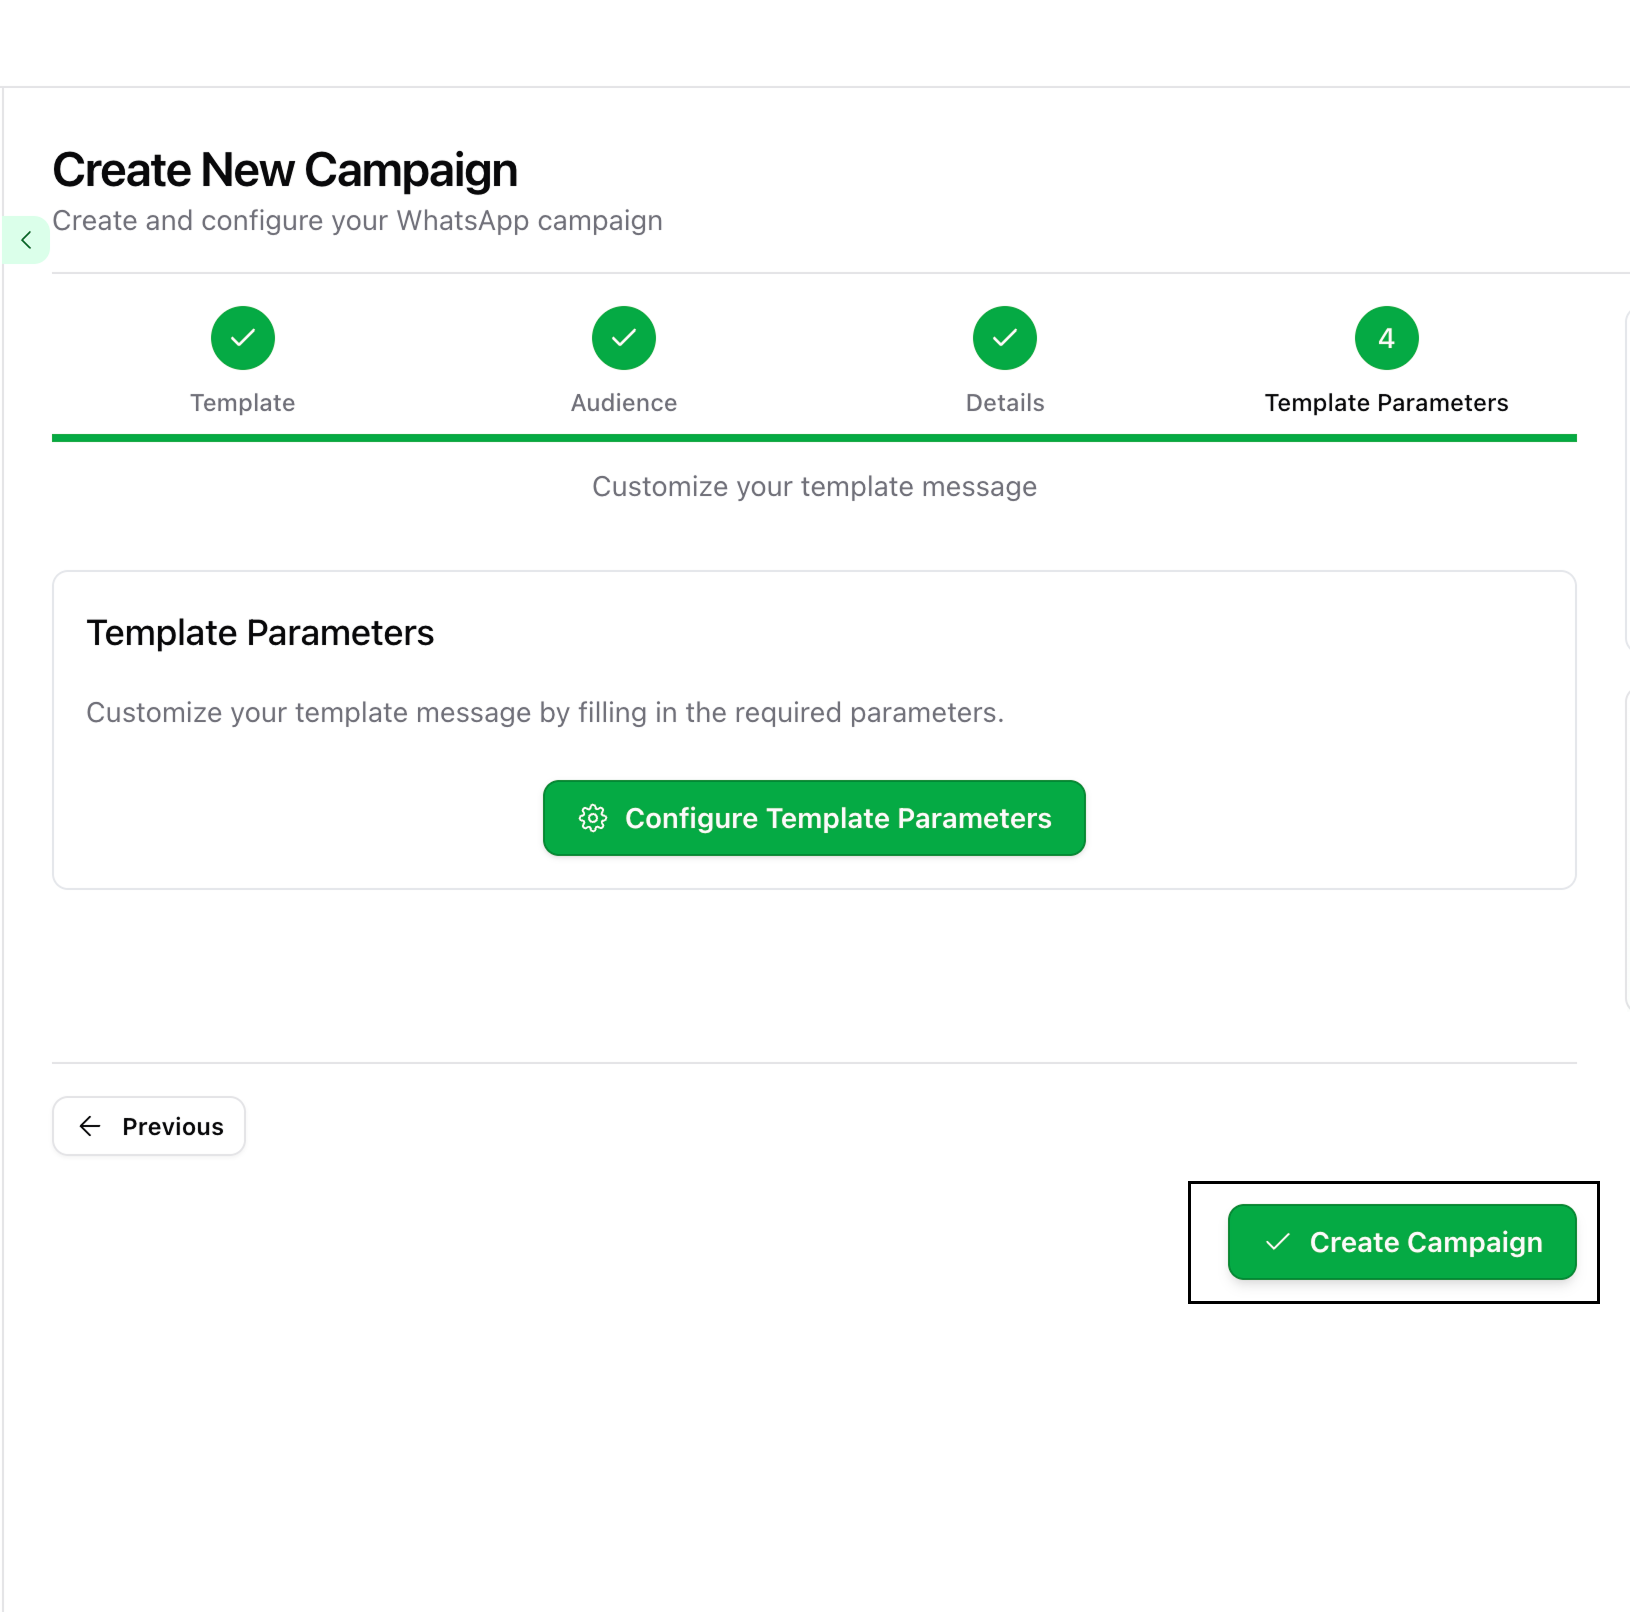
On the campaign summary screen, click Create Campaign to save it as a draft.
***
## 🎯 Finalize & Send Campaign
On the campaign summary screen, click Create Campaign to save it as a draft.
 When you're ready, click the Send button.
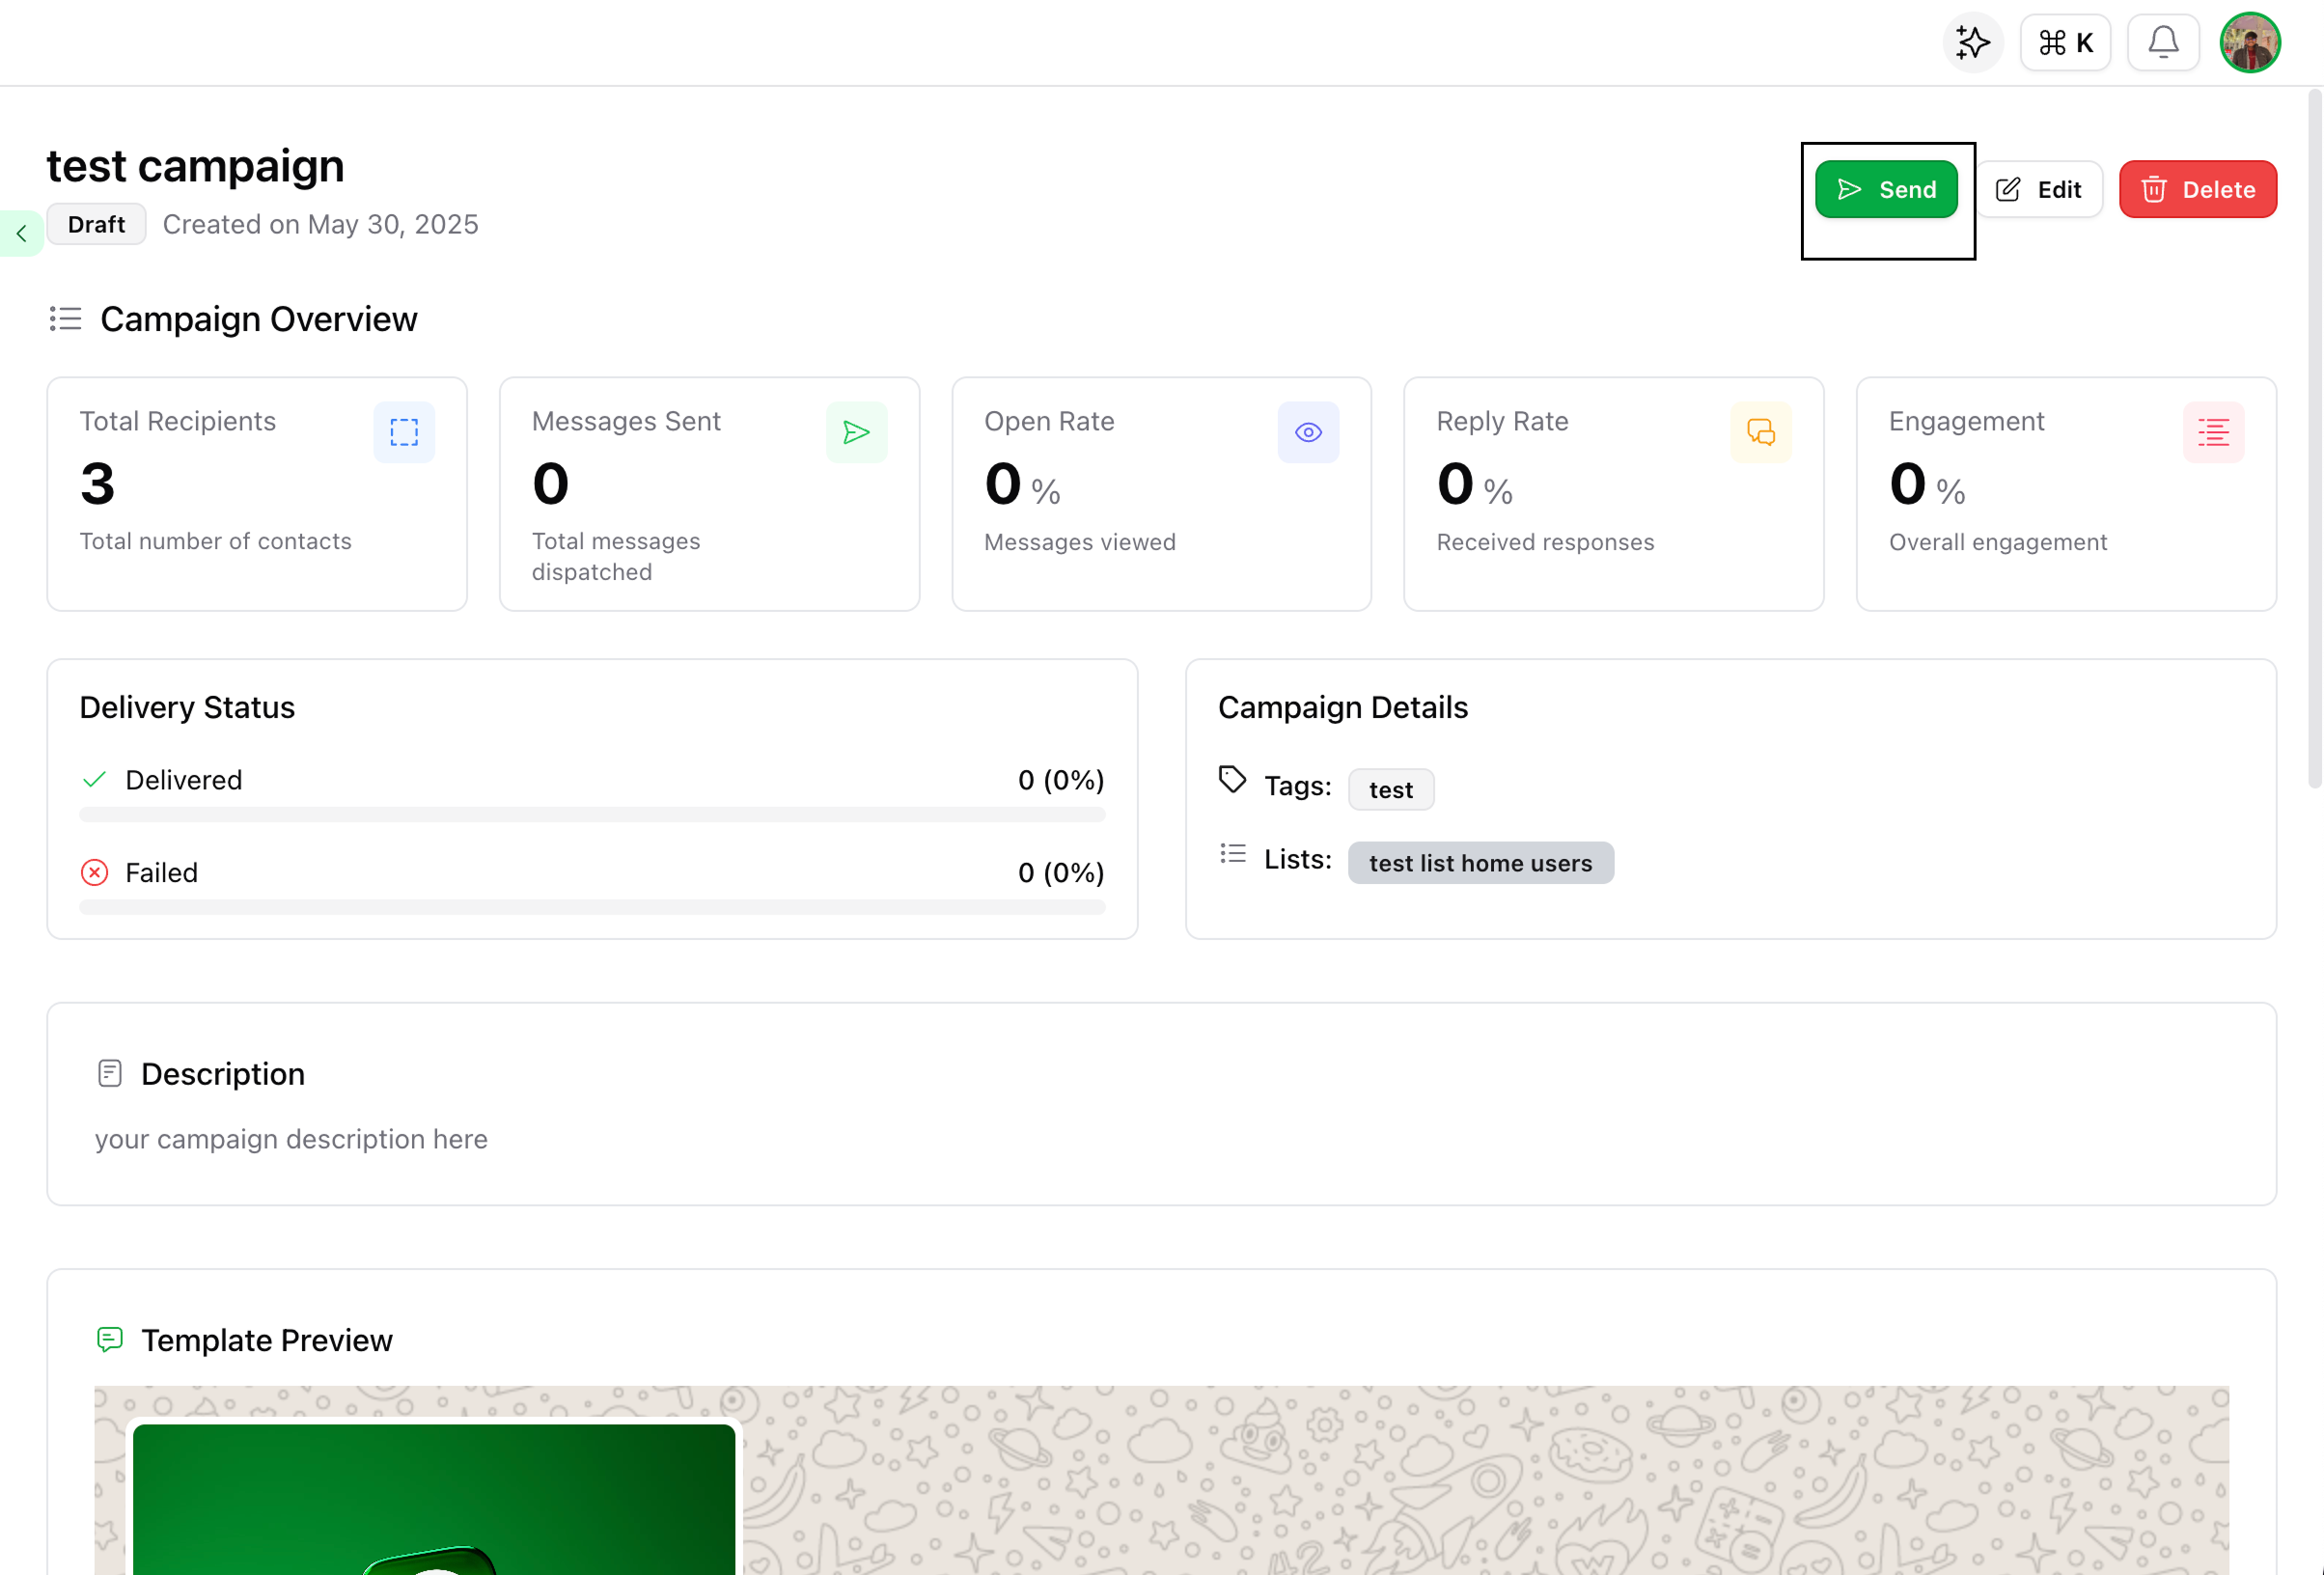 Your campaign is now sending to the selected recipients!
***
## ✅ You’re Done!
Your WhatsApp campaign is now live and ready to track!\
Here’s what you can monitor in the dashboard:
* Delivery status
* Open and reply rates
* Engagement metrics
- If you use a media header, ensure the URL is valid and ends in an image format (e.g., .png, .jpg).
- If a dynamic field is missing for a contact, it will fall back to blank.
- Always preview your message before sending to avoid misconfigurations.
For announcements, campaign tips, or new feature updates, keep an eye on the dashboard announcements panel.
Happy campaigning with Wapikit!
Your campaign is now sending to the selected recipients!
***
## ✅ You’re Done!
Your WhatsApp campaign is now live and ready to track!\
Here’s what you can monitor in the dashboard:
* Delivery status
* Open and reply rates
* Engagement metrics
- If you use a media header, ensure the URL is valid and ends in an image format (e.g., .png, .jpg).
- If a dynamic field is missing for a contact, it will fall back to blank.
- Always preview your message before sending to avoid misconfigurations.
For announcements, campaign tips, or new feature updates, keep an eye on the dashboard announcements panel.
Happy campaigning with Wapikit!